Homemade Playdough!

Photobucket

Have I ever told you that my mom has been a preschool teacher
for like 30 years?
Pretty much amazing to have that in the family when you have little ones.
She is always full of resources and activities...things she does with her classes,
and things she did with me growing up!
(and I cannot believe now I'm doing them with my own girl!)

one of the best:
Homemade Playdough!!

(PS this is a GREAT rainy day/snow day/blazing hot day activity!)

Photobucket

what you need:
1 cup flour
1 cup water
2 tsp tartar
1/3 cup salt
1 T Veg Oil (I used canola)
food coloring

and you might need a little princess or prince to help you....
(I just let her help me stir stuff before I turn the stove on!)

Photobucket

to make:
Mix the flour, tartar and salt all together in a large pot.
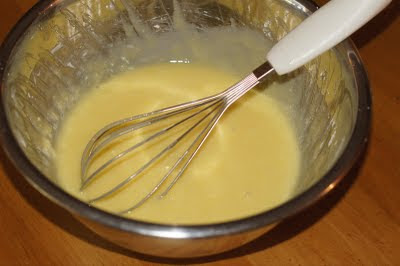
Add the water and oil.
Turn on stove to medium heat.
Stir.
Add food coloring after it's all mixed up a little.
Stir more.
and stir and stir and stir.
(if you stop it will clump!)


Photobucket


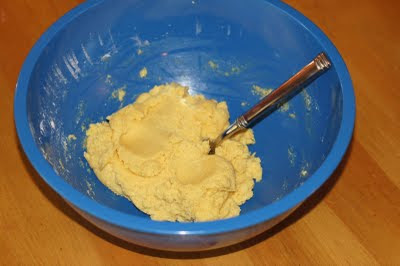
it will eventually become kindof a ball
and start looking like playdough.
Then you know you are done!
*press into it and make sure it's not too soft though.
If it is keep it over the heat a little longer!*


Photobucket

drop the ball of dough onto foil to cool!
It's so pretty right?

Photobucket

I got a little crazy.
I decided it might be cool to add some glitter to one batch
(see the yellow below)
It turned out awesome, and needless to say my little princess LOVES it!

Photobucket

now, go have fun.
make lots and lots of hearts and stars. :)

Photobucket Photobucket

I just store it in large Ziplocks, and it saves for a good while!

Photobucket

Happy Playdough making!

Photobucket post signature

Busy Bag Swap!

My old Mommy and Me group
got together in Dallas last weekend to do a "Toddler Busy Bag Swap"...
Busy Bags to carry with us for our Busy Toddlers. :)

There were 8 of us, so each person made 8 bags of our activity,
and then we each grabbed one!
Now I've got 8 different portable activity bags to take with me wherever needed...
doctor's office, restaurant, car trip, etc.

null

Our kiddos had not seen each other in a long time, so they played hard while all us mommies got to catch up a bit.
They spent some good time jumping in Clark's crib...
Abigail clearly had fun. :)

null

OK so here are the activities everyone made...
Each person just put them in Ziploc bags or in pencil bags.
These were all awesome ideas, (several from Pinterest I'm sure!)

color sorting with paint samples
null

velcro popsicle sticks - can attach and make shapes
null

counting cards - with numbers and dots
null

stencil coloring
null

"build a sandwich" - with fabric pieces and in a sandwich shaped tupperware
null

"button train"
null

felt face with lots of "features" to play with
null

matching animal cards
null

So fun, right?!
I can't wait to use these...they'd even be good rainy day activities,
things to only bust out every now and then to keep it fun.

null

Our littles all had a BLAST together!
They even snored all together in Clark's crib...CUTEST thing ever.

null

the "seconds"...

null

Abigail and one of her BFF's Maddy "catching up" over some fun toys.

null

Thanks to Rose for hosting us...
I love all you mamas and cherish you so much!!

*If you have an up-and-coming toddler...I highly recommend making bags like these!
they are seriously life-savers sometimes!*

recipe exchange: Meat Pie!!

Today is a Recipe Exchange over at Casey's...
Check it out for some new meal ideas!
(most of us could use a little help in the kitchen, right?)


Photobucket

today Im making......
MEAT PIE!!!
(yep, meat pie.)
So good, I know you'll love it!

you will need:
1/2 lb ground beef
(you can use more if you want it meatier)
1/4 cup Mayo
1/2 cup milk
2 eggs
1 Tbsp cornstarch
3/4 cup cheddar cheese, grated
3/4 cup swiss cheese, grated
salt and pepper
onion powder (or 1/3 cup sliced green onion)
9 inch frozen pie crust


it's so easy:
brown the beef and set aside

blend mayo, milk, cornstarch, and eggs until smooth

stir in meat and cheese
add salt, pepper and onion powder


pour mixture into pie shell.
Bake at 350 for about 35 minutes

...and you have yourself a
MEAT PIE!
(thanks, Mom!)

yummo.
you KNOW the boys in your life will love this!


for some reason,
this recipe (or at least the name of it)
always makes me think of one of my favorite Joey lines from Friends,
when Rachel makes dessert and accidentally combines two recipes:
"What's not to like?! Custard? Good. Jam? Good. Meat? Goooood."


Happy Cooking,
and Happy Eating!!


Texas Gold Bars

**this is a re-posted recipe from several months ago,
but I thought it'd be yummy to share again!**

from deep in the heart....
some Texas Gold Bars for you!!

This is my mom's yummy recipe,
and a great sweet treat to put on a dessert tray for your next gathering!
did I mention that they are completely fat free?
JUST KIDDING!!

on that note, you will need:
1 stick butter, melted
4 eggs
1 package yellow cake mix
1 1-lb. bag powdered sugar
8 oz cream cheese, softened

thats all fat free stuff, right? :)

(preheat oven to 325)

mix together:
the box of cake mix,
1 egg beaten,
and the melted stick of butter...
this is already looking yummy and buttery, right?

in a separate bowl, mix together with wisk:
the cream cheese (8 oz),
3 eggs beaten,
and the powdered sugar...
now pat the first mixture
(the one with the cake mix)
into a pan.
this will be like your "crust".
I used two 8x8 pans, or you could do it all in a 9x13 pan.


then pour the other mixture on top...


Then pop it in the oven at 325 for about 35 minutes, or until is gets golden brown on top.
stick a toothpick in to make sure its baked though.

YUMMY!!

did you notice that I forgot to take a picture from right after I baked it?
hmmmm...
guilty.
I finally remembered, one row in.

seriously, they are that good.
and so easy!
also, it fools people because they kindof look like lemon bars, but when they eat it,
they realize they are much better (and buttery-er)! :)

Enjoy!!

linking up for Casey's recipe exchange today:
Photobucket


pizza at home!

So this is not a beautiful fancy recipe like so many of you amazing bloggy ladies post all the time...but I just had to share it bc its
my new favorite little d-i-y meal!
Some friends out of town made this for us when we visited
them recently and I LOVE it now!
(thanks J&C!)

I think people often forget that homemade pizza is an option,
because there are so many yummy pizza places around.
But this is a way you can make it more your own,
(and maybe a little healthier too)!
...and its way more fun than tipping the pizza guy at your door.

super quick and easy...here ya go:

pizza sauce and crust (I use whole wheat to make a it a little better for ya)

fresh toppings of your choice...
I used fresh mozzerella, fresh basil, tomatoes, pineapples, and pepperoni.
Other fun toppings we've used are grilled chicken and fresh bell pepper slices.
(be creative - is YOUR pizza and its not 2 bucks for every extra topping!)

spread your sauce on, put the cheese on 1st, and then add your toppings!
put in the oven at 450 (or whatever your crust says), bake for 10 minutes...

and EnJoY!!!
goes great with a Ceasar salad....and a glass of wine of course. :)

Well, thats all! simple, right? thats how I roll.

one more idea: we recently had 4 other couples over for dinner, and I set up a "Pizza Bar". I pre-cut a bunch of fresh toppings and put them in bowls, and set out a crust and sauce for each couple to make and split their own pizza.
it was a hit :)

Hope yall can enjoy a homemade pizza soon!
Happy Wednesday, love yall!


P.S. it blesses me a lot to know that so many of you actually read what I have to say...I love your comments and I love having new "followers" (scroll down to the bottom of the blog to become a follower!) Thanks for sharing life with me!